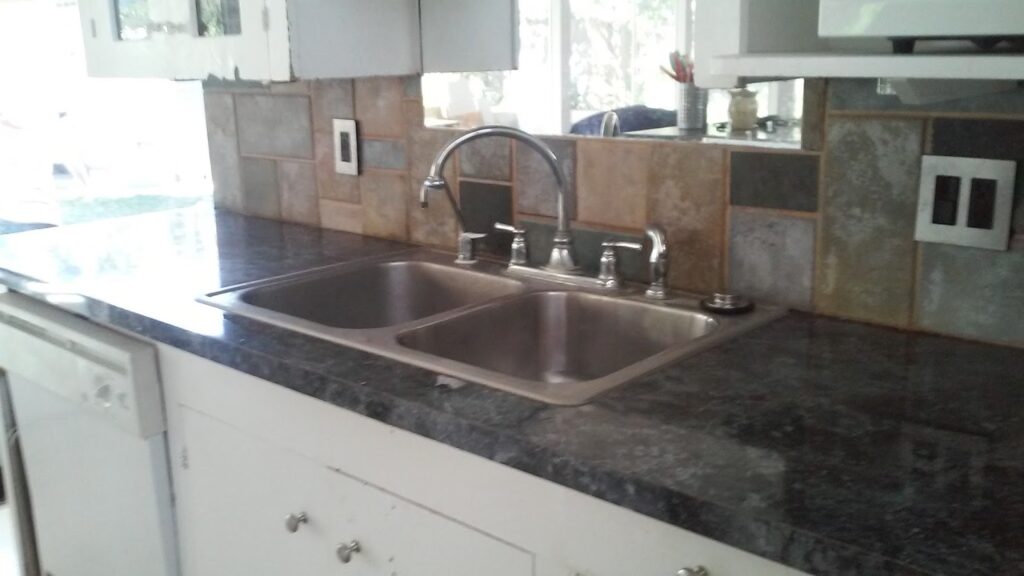
This is how you can turn an old surface mount stainless sink into a nice looking undermount sink for not a lot of money. Total I spent was $120 for tile and mortar, $220 for the faucet, and $180 for a new disposer.

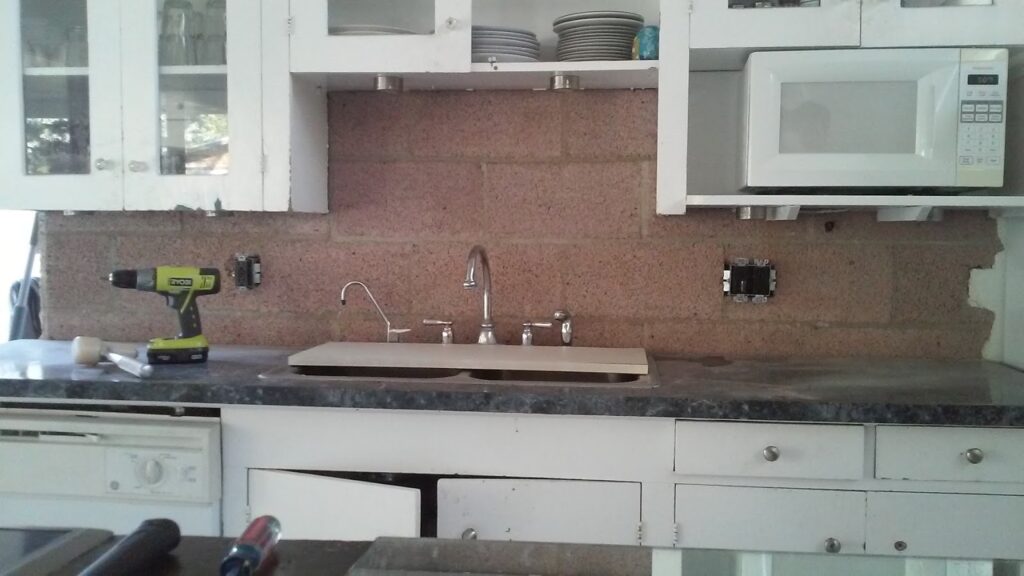
To do this you need to check the lip on the surface mount sink – below is the one I worked with. Mine measured a 1/4″ rise which will work perfectly. So here’s a list of tools I used.
For Demolition:
Hammer and Pry Bar for the tiled backsplash, Cordless Drill for the outlets, Pliers to remove various nails. Crescent Wrench to remove Hoses and Faucet, Locking Pliers for Removing Faucet.
For Concrete Backer Work:
Angle Grinder with either Diamond or Abrasive Disc, Circular Saw with Diamond Blade, Drill, Concrete backer screws and Drill bit for predrilling, Tape Measure
Stone and Tile Work:
Angle Grinder with at least a 1/4″ thick Abrasive Disc, Tile Saw, Mixing Paddle for Mortar and Grout, Corded 1/2″ Drill for Mixing Paddle, 1/4″ Trowel for Mortar, 1/8″ Trowel for Small Tile, Caulking Gun, Regular Epoxy, Silicon Caulk, Stone and Masonry adhesive, 1 3/8″ Diamond Hole drill bit, Compass, Tape Measure, Self-Leveling Laser to check tile alignment, 1/16″ cardboard spacers used for drywall – but I use for spacing tiles too. Various sandpaper grits for polishing stone, steel polishing drill bit that i used for stone, Aluminum tile edging.
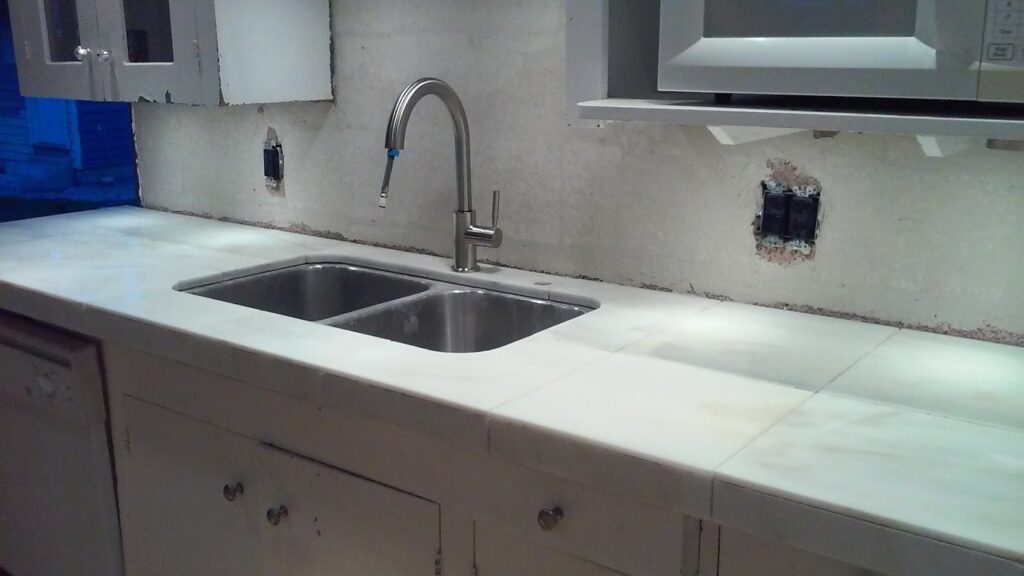
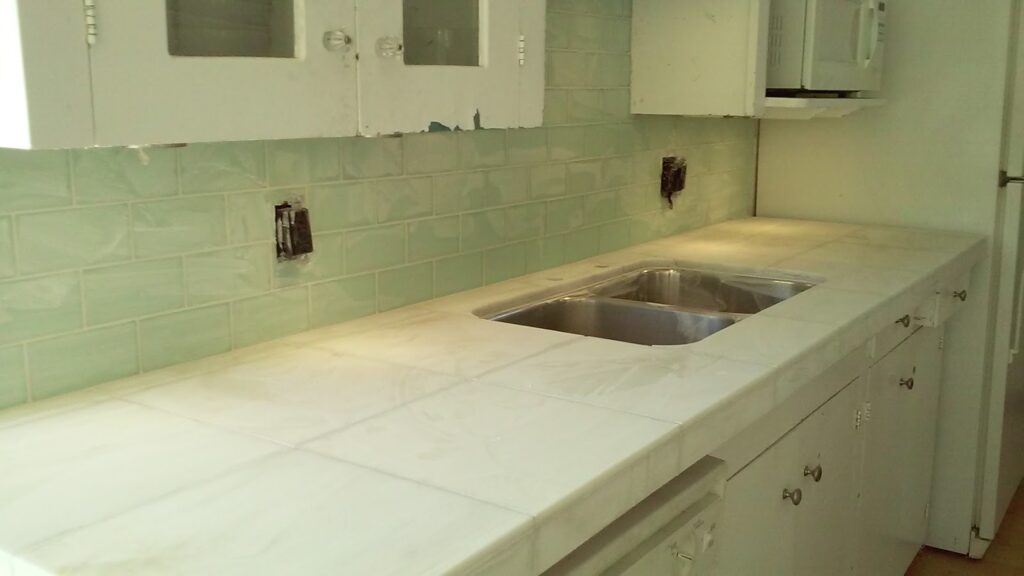
So here’s the countertop… notice the lip is pretty small.
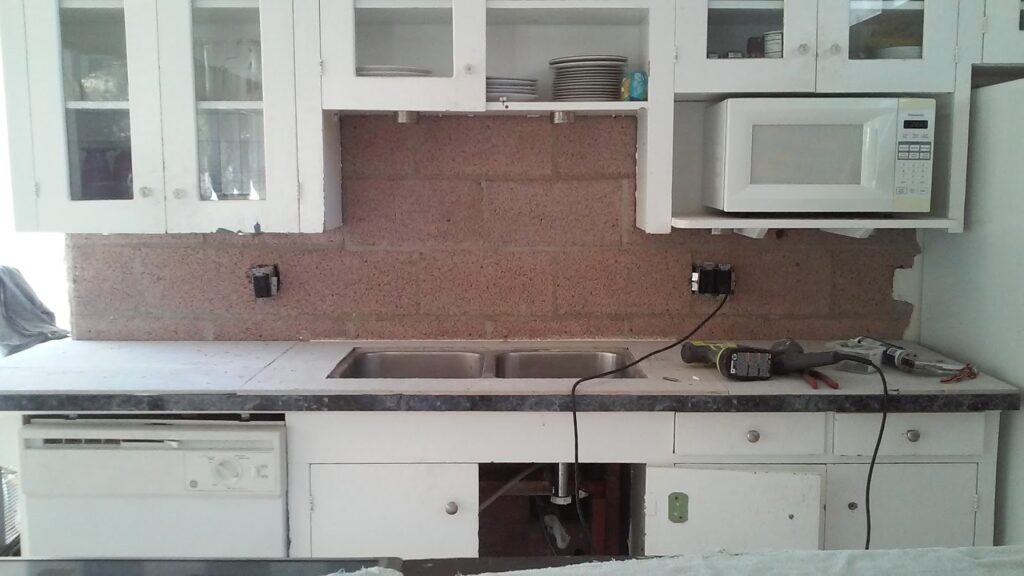
This is after pulling the wall tile off – they were mortared to the old formica backsplash… at least it made demo easy. Had to fix the electrical boxes for the masonry since they pulled out with the tile.
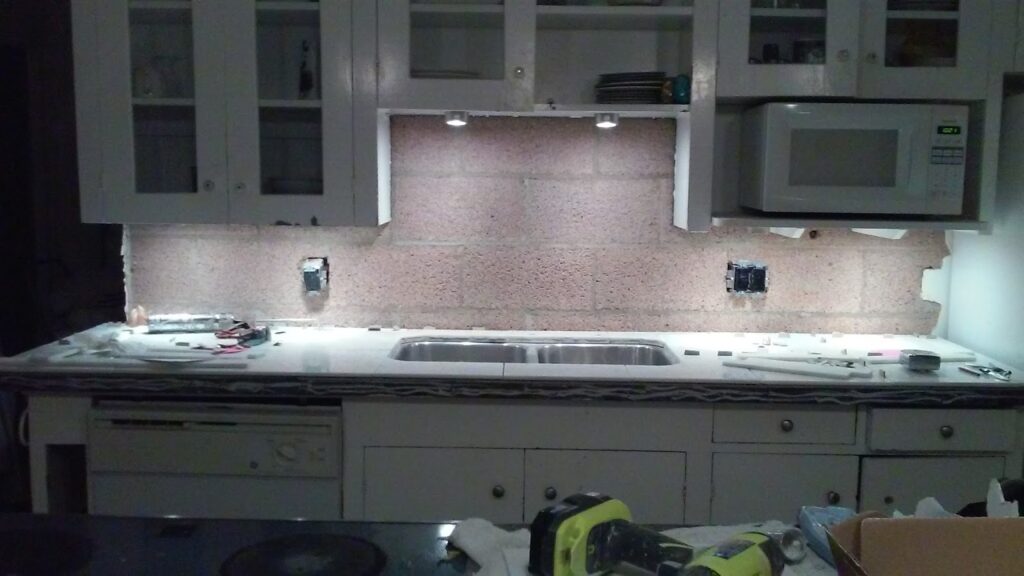
Below is the pic showing the concrete backer going over the sink. This is where you use the circular saw and grinder. The concrete backer is going to stop where the lip stops on the sink. So you need to create a dado on the concrete backer board to fit over that lip. To create the dado, mark all your cuts from your sink on your concrete backer board, set the circ saw to 1/4″. Dado as much as needed, but not more than is needed to go over the lip and create a new level surface.
When applying and screwing down backerboard, predrill and run a bead of glue in the dado to strengthen the cuts. I also screwed the cement backer into the sink and made sure that there were no cement backer board breaks over the longest span of the sink.
The back of my sink didn’t have any backing to support the sink so I also ran a bead of glue along the back to secure the backerboard so that the sink would be more sturdy.
Next, I bought 12×12 marble tile because I could get it right then at Home Depot, but 18×18 would be MUCH bettter. 12×12 caused weird joints around the sink, so if you’re doing it, go for 18×18.
To do the inside corners, I traced the curve with a compass, cut out small pieces to get the general shape of the curve, then used the angle grinder with a 1/4″ abrasive disc to get the curve right. I laid out all the tiles and precut everything, then for the bottom curved pieces, I took leftover small pieces and glued them together to give the look of one piece of stone (I used a “recommended glue” – it was terrible, just use epoxy)
I had to use three pieces to create the curves because the pieces were kind of small, then to fill any gaps, I mixed marble dust with epoxy and let it harden in the joint before grinding it down.
After the sink stone had the right curves, i used the steel polishing drill bit and sanded the stone down. Then used 200 and 400 grit wet sand paper to polish the stone.
Use 1/16″ gaps at most, I did 1/8″ and wish I hadn’t. Also, run the stone tile right up to the bowl, unlike what I did, so the lower glued pieces are larger and not as brittle. Makes working the glued joint easier. I did mine the way I did just because of how the tile joints lined up…
Also make sure to drill your faucet holes too. Make sure when drilling that you find a way to keep the drill bit wet – it makes it a lot easier. I submerged my tile in a radio flyer wagon that was filled with water. I just put a piece of plywood below and it worked like a charm.
With a 1/4″ Trowel I mortared in the stone tile, I also laid a bed of mortar over the CMU. When laying the countertop, there’s this tool that’s hooked that you can pull tile back up pretty easily. Getting the tile perfectly level is primo importante, so you’re probably going to pull a tile or two and redo them.
For the edge pieces, while I was laying the tile I also put fiberglass tape down for the edge pieces. The tape hung over the edge almost entirely. Then I used an Aluminum edging piece for tile to support the tile and screwed it in to the countertop edge to pull the fiberglass tape tight. That way the tile mortar had something to grab onto and the tile had something to support it.
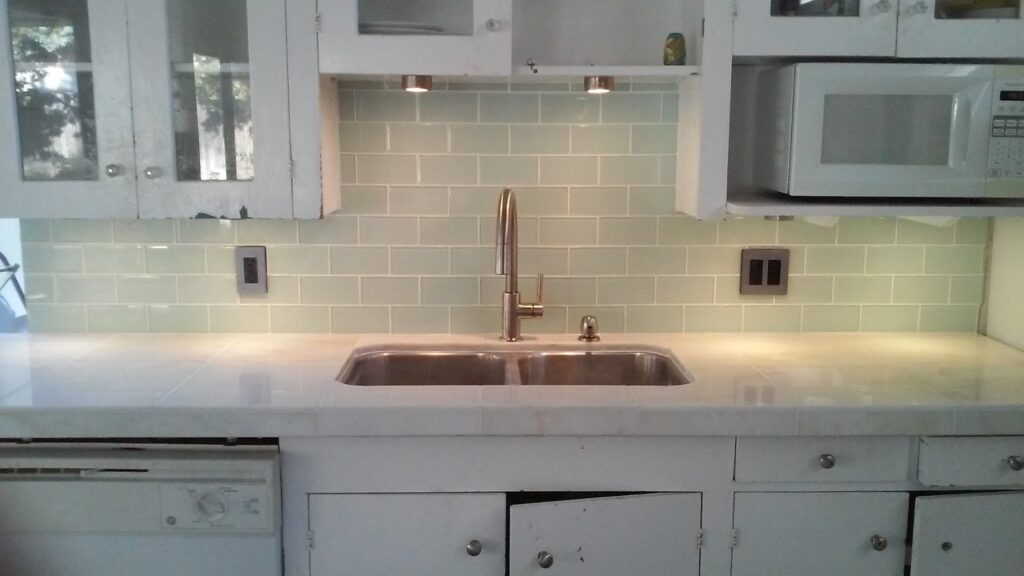
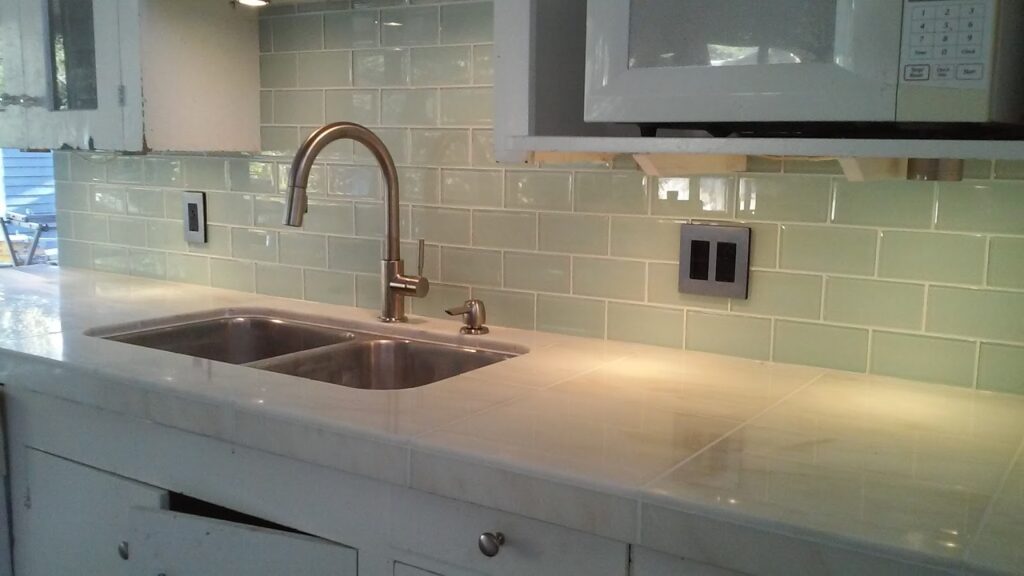
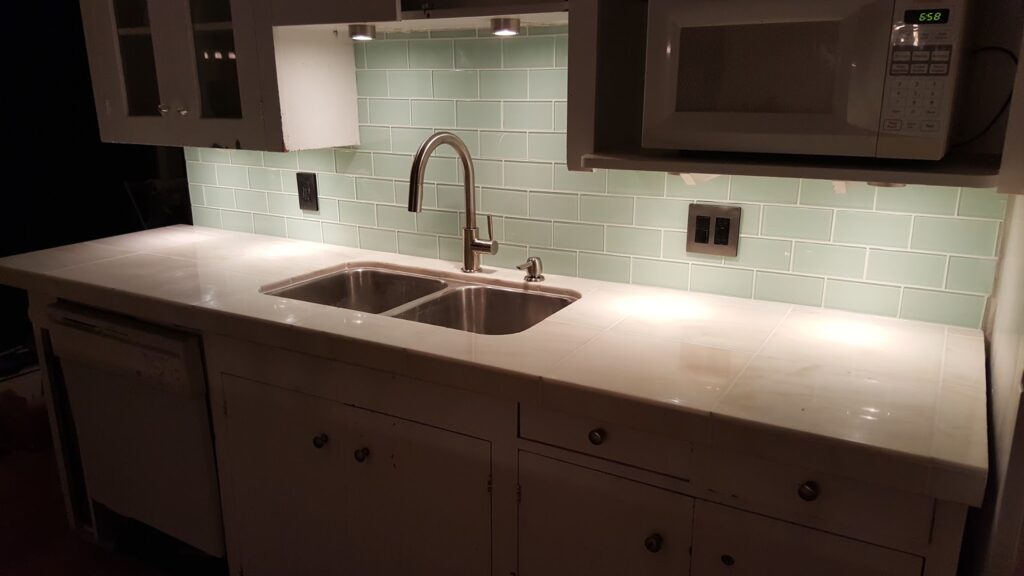
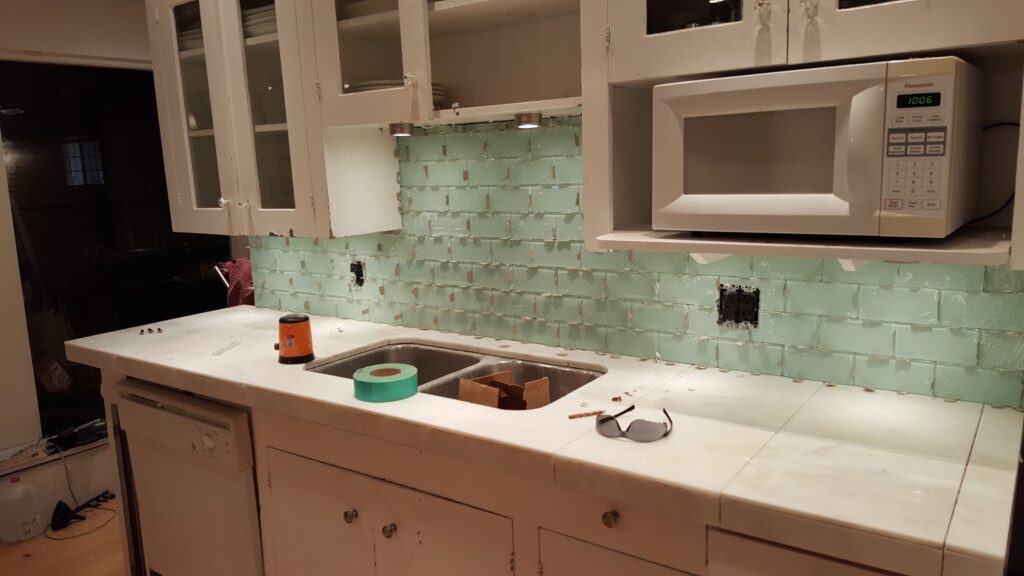
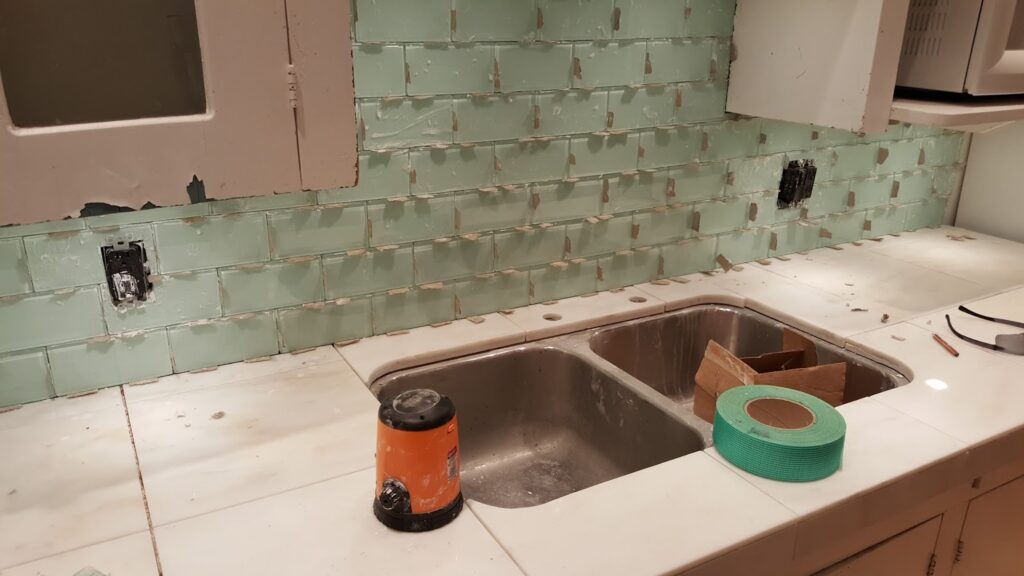
I did a 3×6 glass subway tile for the backsplash. Warning – if you work with glass tile, get heavy duty latex gloves and make sure to wear eye protection! This job was pretty small and I didn’t have some gloves on hand. Light-duty latex just gets torn to shreads in no time with glass. Let me put it this way, I had so many cuts on my fingers, my thumbprint reader on my phone didn’t work for days!
Also, here is where I use the cardboard 1/16″ drywall spacers. I like the cardboard strips because you can tear it and the taper formed by the tear can help w fixing an out of level tile row.
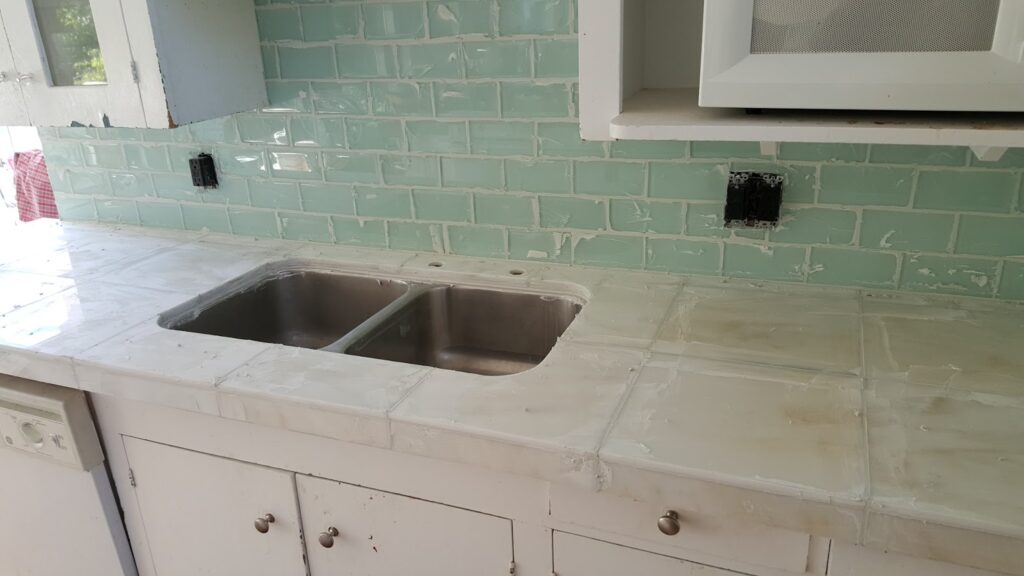
Grouted and Cleaned.
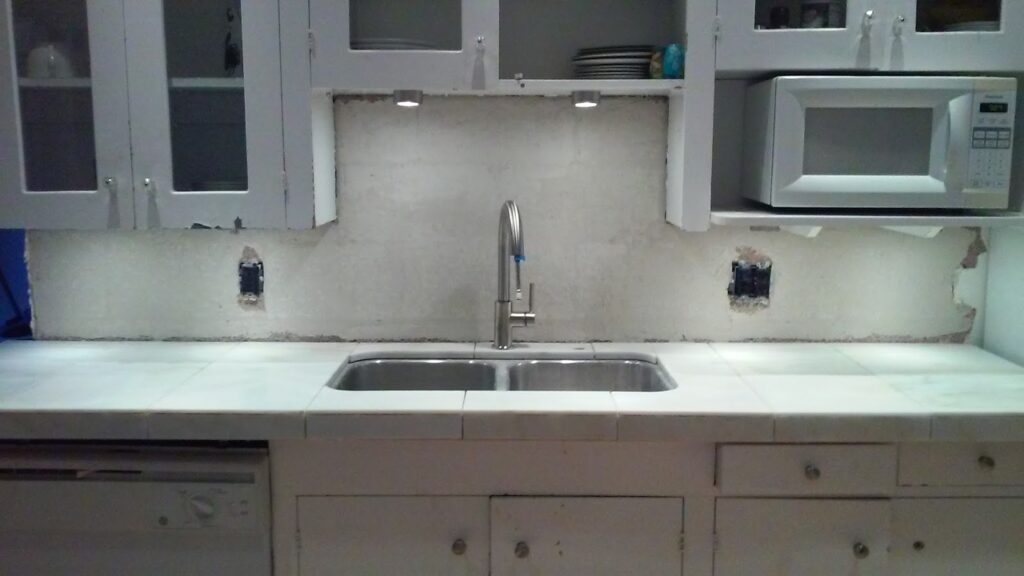
Cleaned even more, Caulked around the sink and also the backsplash/countertop joint. ready for the new faucet and for the electrical covers to go back.
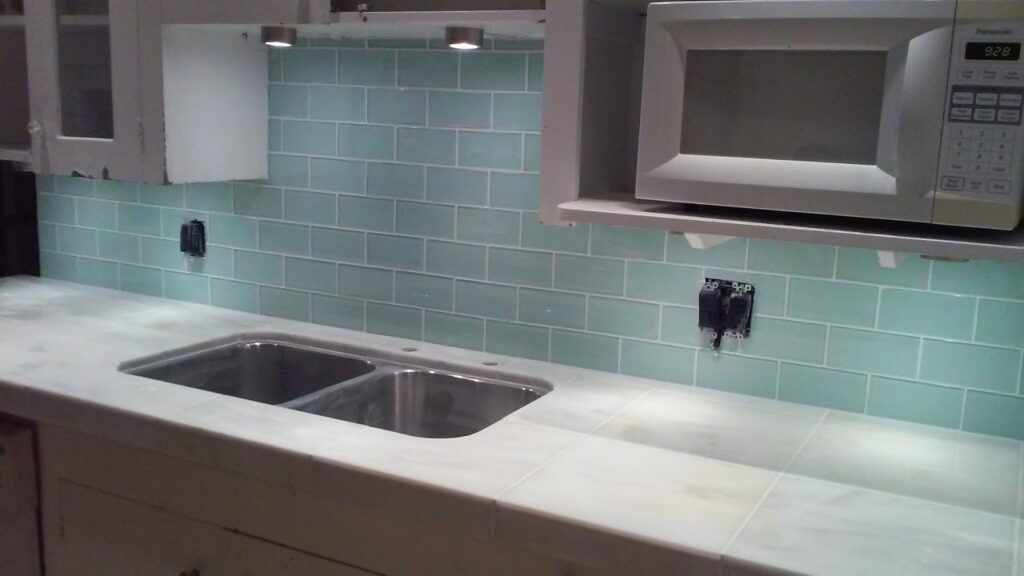
Finished